
Starting Genomics
In previous lessons, you learned how to use the bash shell to interact with your computer through a command line interface. In this lesson, you will be applying this new knowledge for genomics oriented examples and data. These data might be located on a remote supercomputer (or even a remote cloud service). We will spend most of our time learning about the basics of the shell by manipulating some experimental data. Some of the data we’re going to be working with is quite large, and we’re also going to be using several bioinformatics packages in later lessons to work with these data. NOTE, that if we are working with data on a remote server we may have the data preinstalled.
To avoid having to spend time downloading the data or downloading and installing all of the software, we’re going to begin with the data available locally by downloading it here. Also registered students can download it from Canvas. Put the file on your desktop and unzip it to create a new hierarchical filesystem called “shell_data” (our previous setup was “data-shell”)
Review sequencing:
There are many ways to sequence DNA and RNA. We will talk about only Illumina style sequencing for now, which comprises over 90% of all sequence data. The Illumina method uses “sequencing by synthesis” where a single strand of DNA is sequenced, inside a “flowcell” by synthesizing the opposite strand (base-by-base) using a polymerase. During the synthesis, the addition of a specific nucleotide base (A, G, C, or T) is verified by a fluorescent signal, and the light is photographed. Each strand of DNA being sequenced is “captured” or stuck in one place inside the flowcell. This makes it possible for a computer to keep track of each DNA strand which fluoresces as it is being sequenced. The instrument at Oklahoma State can track 400 million DNA sequencing reactions simultaneously! The sequence generated by each captured strand is called a “read”, and the “read length” can vary between instruments or experiments. Finally, it is very common for Illumina instruments to essentially “flip” the DNA strand around, and get sequence for the other end of the strand being sequenced. When this happens, you have two sequences (two “reads”) from each fragment, and this is called paired end sequencing. There are separate read output files for each end of the strand, so each DNA fragment has reads stored in a file indicated as “Read 1” and a file with “Read 2” (yes, that means 800 million reads!). The most common output format of the resulting sequence read files is the “fastq” format and that’s the sequence data format we will work with. Just be aware that not all sequence data are in fastq format, as the technology is constantly advancing.
What is a shell and why should I care?
- Many bioinformatics tools can only be used through a command line interface, or have extra capabilities in the command line version that are not available in the GUI. This is true, for example, of BLAST, which offers many advanced functions only accessible to users who know how to use a shell.
- The shell makes your work less boring. In bioinformatics you often need to do the same set of tasks with a large number of files. Learning the shell will allow you to automate those repetitive tasks and leave you free to do more exciting things.
- The shell makes your work less error-prone. When humans do the same thing a hundred different times (or even ten times), they’re likely to make a mistake. Your computer can do the same thing a thousand times with no mistakes.
- The shell makes your work more reproducible. When you carry out your work in the command-line (rather than a GUI), your computer keeps a record of every step that you’ve carried out, which you can use to re-do your work when you need to. It also gives you a way to communicate unambiguously what you’ve done, so that others can check your work or apply your process to new data.
- Many bioinformatic tasks require large amounts of computing power and can’t realistically be run on your own machine. These tasks are best performed using remote computers or cloud computing, which can only be accessed through a shell.
As you progress through this lesson, keep in mind that, even if you aren’t going to be doing this exact same workflow in your research, you will be learning some very important lessons about using command-line bioinformatics tools. What you learn here will enable you to use a variety of bioinformatic tools with confidence and greatly enhance your research efficiency and productivity.
This lesson assumes no prior experience with the tools covered in the workshop. However, learners are expected to have some familiarity with biological concepts, including the concept of genomic variation within a population. This lesson is originally part of a workshop that uses data hosted on an Amazon Machine Instance (AMI). We will be working with the Pete supercomputer at Oklahoma State University. The access to the required data is provided on the Data Carpentry Genomics Workshop setup page.
Setup Prerequisites
- You will need an account on the Pete supercomputer in the HPCC of Oklahoma State University if you don’t have one.
- You should have installed the software “Putty” but if not you can download it from the Putty Download site if you are using a Windows machine.
Logging onto a Remote server
Connecting to Pete with a Mac
Open your terminal program and type in:
ssh pete.hpc.okstate.edu
Then login with your username and password
Connecting using PC to Pete
- Open Putty
- Paste in the ‘Host Name (or IP address)’ section the IP address e.g. pete.hpc.okstate.edu
Keep the default selection ‘SSH’ and Port (22)

Then click ‘Open’. If you get a warning message about permissions or certificates, please answer “yes”.
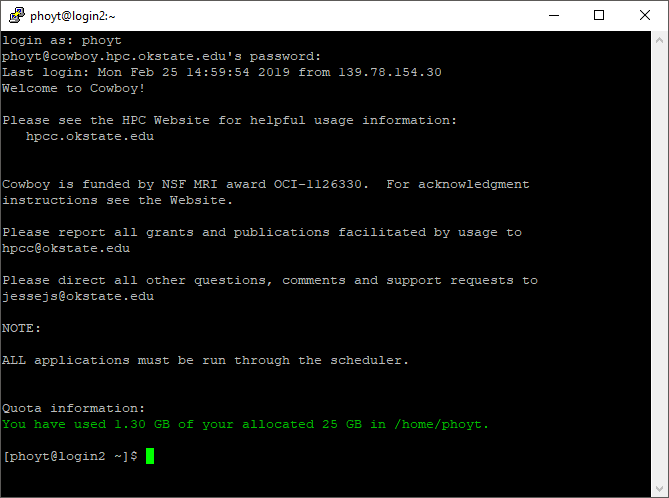
When the Cowboy window opens, you will be asked to provide a login and password
Note: When typing your password, it is common in Unix/Linux not see any asterisks (e.g. **) or moving cursors. Just continue typing.
Let’s find out where we are by running the command pwd (remember this stands for “print working directory”). At any moment, our current working directory is the directory that where the computer assumes we want to run commands. Unless we explicitly specify something else. Here, the computer’s response is /home/<username>, which is our home directory within this system.
Alright, you are logged on to the system! IMPORTANT! If you are going directly to the NEXT LESSON, leave your Cowboy login window open! Don’t touch it. We want both windows to be open.