Windows-jekyll-install
Installing Ruby, bundler, and Jekyll on a Windows10 computer
Installing Software
If you want to set up Jekyll so that you can preview changes on your own machine before pushing them to GitHub, you must install the software described below.
(Note: This is my own experience with installing these software onto Windows10. It has not been tested on other Windows versions)
All installations are done as an Administrator from a Windows cmd.exe terminal window or otherwise run as an Administrator
- Ruby. This is included with Linux and macOS; the simplest option on Windows is to use RubyInstaller (run as an Administrator). You can test your installation by running
ruby --version. For more information, see the Ruby installation guidelines. - RubyGems. (the package manager for Ruby). You can test your installation by running
gem --version. - Gems install bundler Update your gems to install bundler by running
gem update --system - Jekyll. You can install this by running
gem install jekyll.
Detailed Instructions:
INSTALL Ruby for Windows:
- Download and Install Git for Windows which installs the GitBash Terminal: https://gitforwindows.org/
- After installing Git (if already installed, make sure it is upgraded to latest version) use Git to connect to github to download a repository, e.g. spreadsheet-ecology-lesson from Data Carpentry site.
- Update to latest version using
git update, then close the Git terminal window.
- Downloaded the Ruby for Windows installer rubyinstaller-devkit-2.6.6-1-x64.exe from https://rubyinstaller.org/
- Run the RubyInstaller (Run as Administrator: right-click on installer and select “Run as Administrator”)
- After installer completes, hitting “enter” exits the
cmd.exeprompt - Re-open
cmd.exe: You can test your installation by runningruby –version
C:\WINDOWS\system32>gem --version
3.0.3

C:\WINDOWS\system32> ruby --version
ruby 2.6.6p146 (2020-03-31 revision 67876) [x64-mingw32]
RubyGems should now be installed
- The Ruby install is now in the Windows10 Environment Variables and the PATH
- RubyGems (the package manager for Ruby) v3.0.3 should already be installed in your Ruby environment
- Check by running `gem –version` in your cmd.exe terminal window.
NOTE: More information on this site: https://www.rubydoc.info/github/rubygems/rubygems
Check that Installing Ruby via Windows cmd.exe extended Ruby functions and availability to GitBash!
Close Windows Command terminal and open Gitbash terminal:
Check that ruby was installed correctly:
MINGW64 ~$ ruby --version`
ruby 2.6.6p146 (2020-03-31 revision 67876) [x64-mingw32]
Check that gems are working from GitBash:
MINGW64 ~$ gem --version
3.0.3
Close Gitbash terminal
Reopen (& Run as Administrator) the Windows cmd.exe (NOT the “Ruby command window” which will show up in your start menu)
C:\WINDOWS\system32>gem --version
3.0.3
Update your RubyGems from inside the Windows cmd.exe Run as Administrator. This will also install bundler!
C:\WINDOWS\system32>gem update --system
Updating rubygems-update
Fetching rubygems-update-3.1.2.gem
Successfully installed rubygems-update-3.1.2
Parsing documentation for rubygems-update-3.1.2
Installing ri documentation for rubygems-update-3.1.2
Installing darkfish documentation for rubygems-update-3.1.2
Done installing documentation for rubygems-update after 248 seconds
Parsing documentation for rubygems-update-3.1.2
Done installing documentation for rubygems-update after 0 seconds
Installing RubyGems 3.1.2
  Successfully built RubyGem
  Name: bundler
  Version: 2.1.2
  File: bundler-2.1.2.gem
Bundler 2.1.2 installed
RubyGems 3.1.2 installed
Regenerating binstubs
Parsing documentation for rubygems-3.1.2
Installing ri documentation for rubygems-3.1.2

(snip... LOTS of info about updates)

RubyGems installed the following executables:
        C:/Ruby26-x64/bin/gem
        C:/Ruby26-x64/bin/bundle

Ruby Interactive (ri) documentation was installed. ri is kind of like man
pages for Ruby libraries. You may access it like this:
  ri Classname
  ri Classname.class_method
  ri Classname#instance_method
If you do not wish to install this documentation in the future, use the --no-document flag, or set it as the default in your ~/.gemrc file. See 'gem help env' for details.

RubyGems system software updated

C:\WINDOWS\system32>
Now Install Jekyll under the Windows cmd.exe terminal window (no need to exit your currently running terminal)
gem install Jekyll
(snip...Lots of fetching then installing…)
(snip...Warnings about breaking Rails fallbacks)

Jekyll 4.0 comes with some major changes, notably:

  * Our `link` tag now comes with the `relative_url` filter incorporated into it.

  * Our `post_url` tag now comes with the `relative_url` filter incorporated into it.

    For further details: https://github.com/jekyll/jekyll/pull/7589

  * Support for deprecated configuration options has been removed. We will no longer
    output a warning and gracefully assign their values to the newer counterparts
    internally.
Done installing documentation for public_suffix, addressable, colorator, http_parser.rb, eventmachine, em-websocket, concurrent-ruby, i18n, ffi, sassc, jekyll-sass-converter, rb-fsevent, rb-inotify, listen, jekyll-watch, kramdown, kramdown-parser-gfm, liquid, mercenary, forwardable-extended, pathutil, rouge, safe_yaml, unicode-display_width, terminal-table, jekyll after 182 seconds
26 gems installed
C:\WINDOWS\system32>
Mine looked like 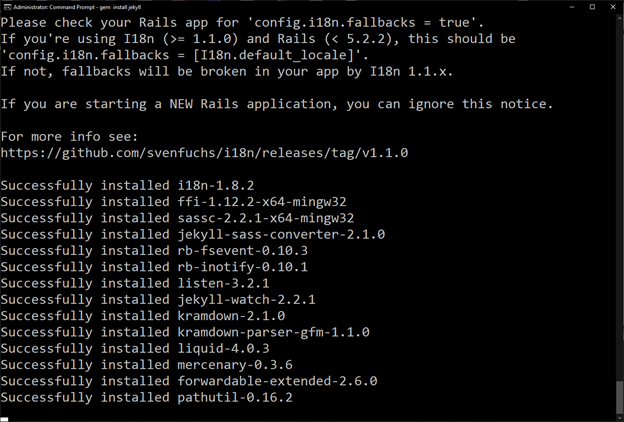
Close Windows command terminal.
Open Gitbash Window
Check RubyGems install, and Jekyll install:
MINGW64 ~
$ gem --version
3.1.2

MINGW64 ~
$ jekyll --version
jekyll 4.0.0

MINGW64 ~
$ pwd
/c/Users/Pete
Change directories into your local Git repository, e.g. “Spreadsheet-ecology-lesson (gh-pages)”
Render Pages locally:
MINGW64 ~/git/spreadsheet-ecology-lesson (gh-pages)
$ make serve   <== or use bundle exec jekyll serve
Configuration file: C:/Users/Pete/git/spreadsheet-ecology-lesson/_config.yml
            Source: C:/Users/Pete/git/spreadsheet-ecology-lesson
       Destination: C:/Users/Pete/git/spreadsheet-ecology-lesson/_site
 Incremental build: disabled. Enable with --incremental
      Generating...
                    done in 9.541 seconds.
  Please add the following to your Gemfile to avoid polling for changes:
    gem 'wdm', '>= 0.1.0' if Gem.win_platform?
 Auto-regeneration: enabled for 'C:/Users/Pete/git/spreadsheet-ecology-lesson'
    Server address: http://127.0.0.1:4000
  Server running... press ctrl-c to stop.
NOTE: a “.jekyll-cache” folder may appear which MUST be IGNORED
- Add this folder to .gitignore
Note from @fmichonneau :
Also note that the .jekyll-cache folder gets created by Jekyll 4 (that GitHub Pages doesn’t support yet).
So it’s best to use the Make command make serve to preview the site locally if you can or at least bundle exec jekyll serve.
Also note that a non-carpentry-style “plain” repository with no .bundle directory must be rendered locally using jekyll serve
because make serve and bundle exec jekyll serve do not work.